Resources

Developer Resources

Documentation, guides, and tools to help you get the most out of our products

User Manual for
SERENEDI (Snowflake)

SERENEDI Snowflake Manual


User Manuals for
SERENEDI (Windows)

SERENEDI 2024 Manual

SERENEDI 2022 Manual

User Manual for
Chiapas EDI Enterprise

Chiapas EDI Manual


Installation Instructions

SERENEDI for Snowflake is a Snowflake Native App. Installation creates the application within your Snowflake account,
provisions the resources it needs to run, and configures a consumer-owned database where your EDI files and processed
output will reside. No software is installed outside of Snowflake. For a step-by-step walkthrough of the installation, see the SERENEDI for Snowflake manual.

Prerequisites

Before you begin, confirm that you have the following:

Snowflake Account

An active Snowflake account with access to the Snowflake Marketplace.

ACCOUNTADMIN Role

The initial setup steps require ACCOUNTADMIN privileges to install the application and grant the necessary account-level permissions.

Compute Pool Privileges

The account must allow creation of compute pools for Snowpark Container Services (SPCS). SERENEDI’s containers run within these pools.

Warehouse

A Snowflake virtual warehouse is required for SQL operations. SERENEDI will create or reference one during setup.

Quick-Start Script

The following script performs a complete SERENEDI installation. This script is also found in the README. Expert users can
run this as a single block from a Snowsight SQL worksheet. Each step is explained in detail in the sections that follow.
Note on roles: This script creates a dedicated SERENEDI_ROLE for day-to-day SERENEDI operations. If your organization
prefers to use an existing role, replace every occurrence of SERENEDI_ROLE in this script with your role name and remove
the CREATE ROLE and GRANT ROLE statements.

Once you have completed the installation script, see the manual for a Functional Walkthrough that tours the various integration workflows within SERENEDI for Snowflake.


-- ============================================================
-- SERENEDI for Snowflake: Installation Script
-- Replace SERENEDI_ROLE with your own role if preferred.
-- ============================================================
-- Step 1: Install the application (skip if installed via Marketplace)
-- USE ROLE ACCOUNTADMIN;
-- CREATE APPLICATION SERENEDI FROM …;
-- Step 2: Grant account-level privileges
USE ROLE ACCOUNTADMIN;
CALL SERENEDI.MAIN.GRANT_CALLBACK(
ARRAY_CONSTRUCT('CREATE COMPUTE POOL', 'CREATE WAREHOUSE')
);
-- Step 3: Create the operating role (optional — use your own role instead)
CREATE ROLE IF NOT EXISTS SERENEDI_ROLE;
GRANT ROLE SERENEDI_ROLE TO ROLE SYSADMIN;
-- Step 4: Create the consumer database and transfer ownership
CREATE DATABASE IF NOT EXISTS SERENEDI_DATA;
GRANT OWNERSHIP ON DATABASE SERENEDI_DATA TO ROLE SERENEDI_ROLE;
-- Step 5: Switch to the operating role (use the role defined during installation)
USE ROLE SERENEDI_ROLE;
-- Step 6: Create schemas and stages
CREATE SCHEMA IF NOT EXISTS SERENEDI_DATA.STAGES;
CREATE SCHEMA IF NOT EXISTS SERENEDI_DATA.OUTPUT;
CREATE STAGE IF NOT EXISTS SERENEDI_DATA.STAGES.EDI_IN DIRECTORY = (ENABLE = TRUE);
CREATE STAGE IF NOT EXISTS SERENEDI_DATA.STAGES.EDI_OUT DIRECTORY = (ENABLE = TRUE);
CREATE STAGE IF NOT EXISTS SERENEDI_DATA.STAGES.CSV_IN DIRECTORY = (ENABLE = TRUE);
CREATE STAGE IF NOT EXISTS SERENEDI_DATA.STAGES.CSV_OUT DIRECTORY = (ENABLE = TRUE);
CREATE STAGE IF NOT EXISTS SERENEDI_DATA.STAGES.XML_IN DIRECTORY = (ENABLE = TRUE);
CREATE STAGE IF NOT EXISTS SERENEDI_DATA.STAGES.XML_OUT DIRECTORY = (ENABLE = TRUE);
CREATE STAGE IF NOT EXISTS SERENEDI_DATA.STAGES.ERR DIRECTORY = (ENABLE = TRUE);
-- Step 7: Grant the application access to consumer resources
GRANT USAGE ON DATABASE SERENEDI_DATA TO APPLICATION SERENEDI;
GRANT USAGE ON SCHEMA SERENEDI_DATA.STAGES TO APPLICATION SERENEDI;
GRANT USAGE ON SCHEMA SERENEDI_DATA.OUTPUT TO APPLICATION SERENEDI;
GRANT READ, WRITE ON ALL STAGES IN SCHEMA SERENEDI_DATA.STAGES TO APPLICATION SERENEDI;
GRANT CREATE TABLE ON SCHEMA SERENEDI_DATA.OUTPUT TO APPLICATION SERENEDI;
-- Step 8: Grant the application role to the operating role
GRANT APPLICATION ROLE SERENEDI.APP_PUBLIC TO ROLE SERENEDI_ROLE;
-- Step 9: Configure the application
DELETE FROM SERENEDI.MAIN.APP_CONFIG
WHERE CONFIG_KEY IN (
'CONSUMER_STAGES_PREFIX',
'CONSUMER_OUTPUT_PREFIX',
'CONSUMER_ROLE'
);
INSERT INTO SERENEDI.MAIN.APP_CONFIG (CONFIG_KEY, CONFIG_VAL) VALUES
('CONSUMER_STAGES_PREFIX', 'SERENEDI_DATA.STAGES'),
('CONSUMER_OUTPUT_PREFIX', 'SERENEDI_DATA.OUTPUT'),
('CONSUMER_ROLE', CURRENT_ROLE());

BASE REQUIREMENTS

Operating System

Windows 7 / Windows Server 2016 and above; Windows 11 is supported with a local domain account and not an Email-based username login.  For all Windows versions, the Date/Time format on the local domain account used for the installation must be set to United States standard before running the installer.

Prerequisites

1. Access to SQL Server 2012 or Above

2. A login account with local administrator access

RAM

SERENEDI requires at least 4 GB of RAM to function. If SERENEDI is licensed for additional cores, it requires 1 GB of RAM per additional core.

Storage

The base installation requires 1 GB of free disk space.  The pipeline folder may consume many GB of additional disk space, depending on your usage.

INSTALLATION

1. Gather the following prerequisites:

  1. SQL Server SERENEDI requires a running SQL Server instance; the examples included in these instructions assume that it was installed:
    1. Using an server instance name of MSSQLSERVER (and not ./SQLEXPRESS)
    2. Using SQL Mixed Mode authentication
    3. Using an ‘sa’ password of ‘strongPass1’
  2. An account and password with local administrator privileges This is the account that will be used with the SERENEDI Service that is installed.  If this is a domain account, it should be expressed in the form DOMAIN\username.  If it is a local account, it should be expressed as ‘.\username’  (no quotes).  The E-mail based logins used for Windows 11 logins cannot be used for the installation.  Even if you are using an E-mail based login, however, you can go to Windows Settings -> Accounts and then “Add Account” (select Administrator) to create the local admin account.  If you create it with a blank password and manually set it afterwards, you should be able to bypass the security questions.
  3. United States Date/Time Format Under Windows Settings, the Regional Format must be set to English (United States) for whatever domain account is used for the installer:
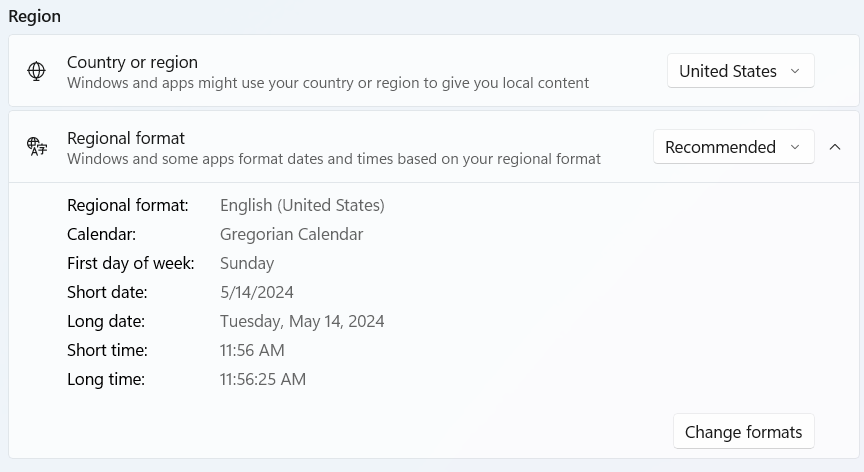
  4. SQL Server connection string This defines the location and possibly the login credentials of the SQL Server account.  For different examples of the connection string, visit https://www.connectionstrings.com/sqlconnection/   This connection string will be used in conjunction with the supplied login credentials above to access the SQL Server specified above.  It will also specify the name of the distribution database – by convention, this is normally called ‘serenediCore’.

2. Run the Installer

  1. The SERENEDI Windows installer is a single MSI file, around 120MB in size, looking like this: 

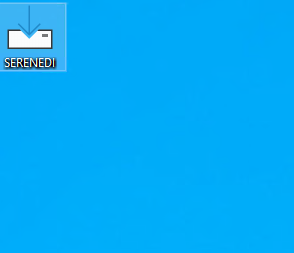
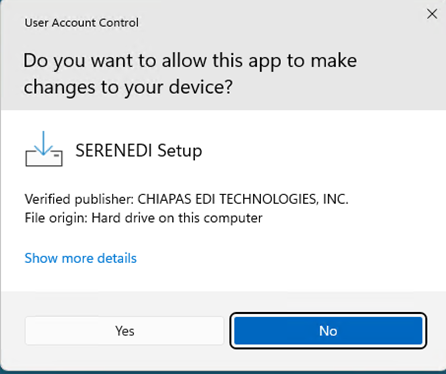
  2. It will likely be named differently than as listed here. Double click on it, and you should receive this popup – click Yes to continue:


  3. Accept the License Agreement


    Click “I accept the agreement” and hit Next.
  4. Read the installation instructions

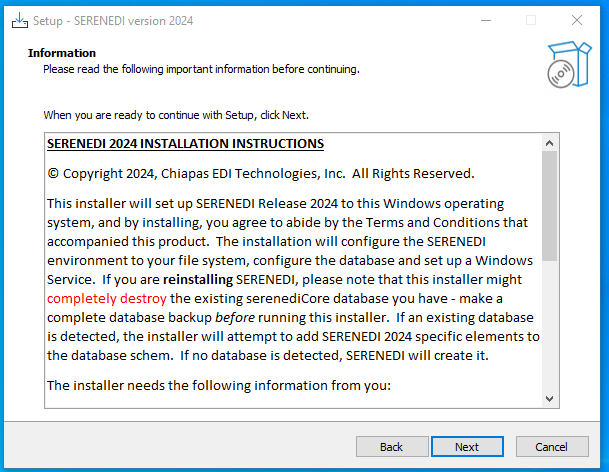
    Click “Next” when you are finished reading.
  5. Fill in the Prompts

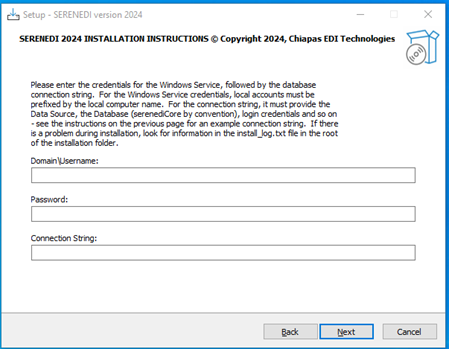
    The Domain\Username prompt is the login credentials used to use the Windows Service. If you are using a local domain account, use “.” For the domain – for example: .\adminEnter the password associated with that account in the password prompt. Finally, enter a connection string that SERENEDI will use to connect to an existing serenediCore database (which it will attempt to upgrade, if it has not been upgraded), or to create a new serenediCore database if one does not exist on that server. An example connection that would connect to a local SQL Server instance with an administrator password of ‘strongPass1’ is as follows:
    Data Source=(local);Database=serenediCore;User id=sa;Password=strongPass1;TrustServerCertificate=true;
  6. Enter the Destination Folder


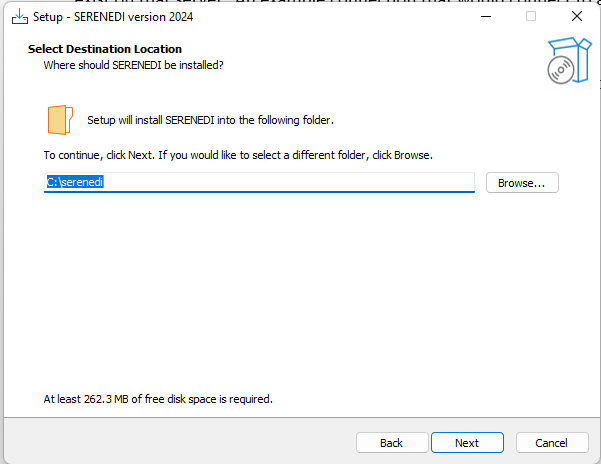
    Enter the destination folder for SERENEDI, or use the default in place, and hit “Next.”
    Click “I accept the agreement” and hit Next.
  7. Confirm the Installation

    Press “Install” to start the installation process.

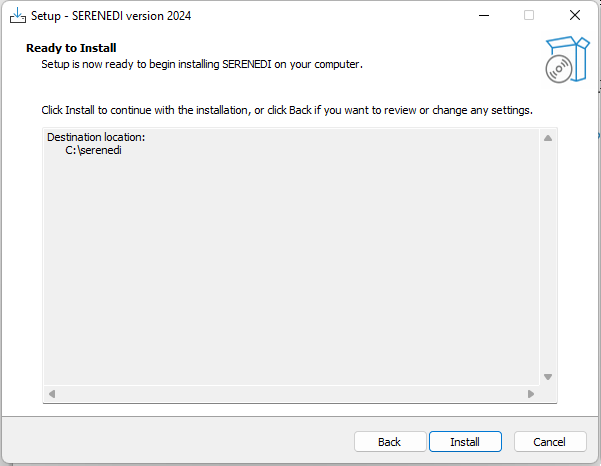
  8. Confirm success If all steps are successful, you should get a Setup Complete dialog. To further ensure normal operation of SERENEDI, go to C:\serenedi\shared\pipeline, and look for the following folder structure:

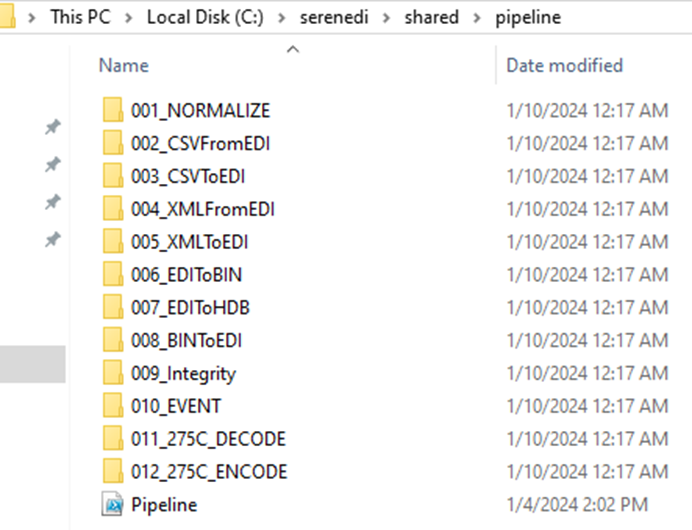
    If this folder structure exists, then SERENEDI is running and processing events successfully.

TROUBLESHOOTING 1. If upgrading the schema of an existing database and you do not see the new 011 and 012 pipeline folders appear, try running the command on the associated distribution SQL Database: insert into BIZ_EVENT (event_data3, event_data4) select ‘INITIALIZE’, ‘$\Pipeline.ps1’ 2. If you have problems, try validating the SQL login credentials. You may have to install SQL Server Management Studio in order to test the login credentials to the server. 3. Most operations are logged to the serenedi root folder under a file called “install_log” – see if there are any problems there.

BASE REQUIREMENTS

OPERATING SYSTEM: Windows 7 / Windows Server 2016 and above

PREREQUISITES:

  • Access to SQL Server 2012 or Above
  • A login account with local administrator access RAM: SERENEDI requires at least 4 GB of RAM to function. If SERENEDI is licensed for additional cores, it requires 1 GB of RAM per additional core. STORAGE: The base installation requires 150 MB of free disk space.

INSTALLATION

1. Gather the following prerequisites:

  • SQL Server connection string:  This defines the location and possibly the login credentials of the SQL Server account.  This account should have permissions to create a database and access it with full permissions.  For different examples of the connection string, visit:  https://www.connectionstrings.com/sqlconnection/ 
  • If you do not have access to a SQL Server instance and would like to quickly set one up:
    1. Install Docker Desktop
    2. Run this command:
      docker run -e TZ=America/Los_Angeles -e "MSSQL_PID=Express" -e ACCEPT_EULA=Y -e SA_PASSWORD=strongPass1 -p 1433:1433 --name MSSQL -d mcr.microsoft.com/mssql/server:2019-latest
    3. Later during the install process when you are prompted for a SQL Connection string, use this:
      Data Source=host.docker.internal;Database=serenediCore;User id=sa;Password=strongPass1;
    4. An account and password with local administrator privileges: This is the account that will be used with the SERENEDI Service that is installed.  If this is a domain account, it should be expressed in the form DOMAIN\username.  If it is a local account, it should be expressed as ‘.\username’  (no quotes). If your database permissions are maintained via Active Directory, this account needs to be fully provisioned with DBO privileges to the database, as well.

2. Run the Installer

  • The SERENEDI Windows installer is a single MSI file, around 65MB in size. Double-clicking on the file will result in the following dialog: 
  • Click Next, then click on the checkbox indicating acceptance of the End-User License Agreement and click Next.  The license viewed will be either a Trial Evaluation license or a Production license.

  • Choose the destination folder for SERENEDI.  By default, the folder is C:\serenedi. If you’d like to choose another folder, enter it here. Otherwise, select Next.

  • Enter in the account with local administrator rights along with the password in the boxes.  If the account is local, precede it with (for example, .\admin for a local account named admin)

  • Enter the connection string to the database.  Note: if you have previously installed SERENEDI to this server, any existing database will be completely destroyed unless you specify a different database name in the connection string.  Also note: in certain circumstances, you may need to add “;TrustServerCertificate=true;” to the end of the connection string.
  • Click “Yes” at the User Account Control popup to start the installation. 
  • After a few seconds, SERENEDI will complete the initial setup and then install the database.  The following window will pop-up: 
  • If all steps are successful, you should get a Setup Complete dialog.  To further ensure normal operation of SERENEDI, go to C:\serenedi\shared\pipeline, and look for the following folder structure: 
Remove-Item 'Registry::HKEY_LOCAL_MACHINE\SYSTEM\ControlSet001\Services\SERENEDIService' -Recurse
sc.exe delete SERENEDIService
<<Reboot Host>>
sc.exe delete SERENEDIService

NOTE 2: Please note that if you are reinstalling with an existing serenediCore database, the installer will destroy the existing serenediCore database and all associated data – so please back up any data you wish to keep before this time.

A 64-bit operating system with .NET 4.0 installed is required; 8 GB of RAM is highly recommended.  To access the integration features of Chiapas EDI Enterprise, SQL Server 2012 R2 or above must be installed. 

  1. Download the installer, an ‘.msi’ executable file. 
  2. Double-click on it; all files will be installed to the C:\chiapas directory.  Next, ensure that you have the Framework 3.5 feature installed, which is a requirement for both the database installer and Chiapas EDI itself.
  3. Double-click on the installer within C:\chiapas\db and install the database to a SQL Server instance.NOTE: If the destination server is not a locally installed Named instance of ‘MSSQLSERVER’, you will need to execute two steps:
    a. Update the connection string on the filesystem at C:\chiapas\bin\cnnstr.txt – if the local instance is named ‘./SQLEXPRESS’, use the connection string embedded within the quotes below.
    b. Update the embedded connection string within the data shuttle trigger located within the chiapasData database. If you are running SQLEXPRESS, run the following SQL to update the connection string: UPDATE chiapasData.dbo.TSRC SET TSRC_DATA01 = ‘Data Source=.\SQLEXPRESS;Database=chiapasData;Trusted_Connection=true;’ WHERE TSRC_ID = 13
  4. If you are using the Evaluation Version or Tier 1 or Tier 2, skip this step.  Otherwise, Chiapas EDI needs a file called “cores.txt” in the C:\chiapas\bin folder before it function.  In this file, put in a single text number indicating the number of concurrent processes Chiapas EDI will launch; this number is generally between 1X and 1.5X the logical CPU count of the computer on which Chiapas EDI is installed.
  5. Start → Right Click on Computer, select ‘Manage’, Go to Configuration, Services, Right-click Properties on ChiapasService, switch to LogOn tab, then ‘Log On As’ information for an account with permissions to log on to the ChiapasData database. 
  6. Return to the General Tab, press ‘Start’ to start running the automation service. 
  7. To run the front-end interface, run the C:\chiapas\bin\ChiapasStudio.exe file as Administrator.

Note 1:  An Installation Demo is also available for your convenience – see the first video below.

Note 2:  If you are upgrading from a previous installation and have modified the c:\chiapas\bin\cnnstr.txt or c:\chiapas\bin\default.winstate files, make a backup prior to re-installing as they will be overwritten

Videos

SERENEDI 2024 Installation

Walkthrough of installing SQL Server and SERENDI 2024 on Windows 10.

SERENEDI: Basic Pipelines

Overview of the built-in pipeline system that provides zero-coding functionality for many operations.

SERENEDI: Triggers & Automation

Full training on the triggers and events, and how to program a simple pipeline in Visual Code.

SERENEDI: Mapping

Full training on how SERENEDI binds to elements defined within the HIPAA Implementation Guide.

This video describes installing the Evaluation Edition to a local PC. A 64-bit operating system with the .NET 4.0 framework is required to install as well as SQL Server 2008 R2 or above is necessary before installation.

A demonstration in decoding an EDI file is demonstrated here using the Chiapas Studio interface.

This video demonstrates using Chiapas Studio along with SQL Server Management Studio to encode raw healthcare eligibility information like member last name and first name into a fully HIPAA compliant transaction.

This video demonstrates using the Workflow Editor to create a completely automated solution to decoding incoming 834 files to database tables.

Mapping Reference

M0 / 5010_270 Health Care Eligibility Benefit Inquiry
M1 / 5010_270_A1 Health Care Eligibility Benefit Inquiry
N0 / 5010_271 Health Care Eligibility Benefit Response
N1 / 5010_271_A1 Health Care Eligibility Benefit Response
O1 / 5010_275C Patient Information *
O2 / 5010_275R Patient Information *
O0 / 5010_276 Health Care Claim Status Request
P0 / 5010_277 Health Care Claim Status Response
P5 / 5010_277CA Health Care Claim Acknowledgment
R1 / 5010_278_ACK Health Care Services Review – Acknowledgment
Q1 / 5010_278_NOT Health Care Services Review – Notification
Q0 / 5010_278_REQ Health Care Services Review – Request for Review
R0 / 5010_278_RESP Health Care Services Review – Response
S0 / 5010_820 Payroll Deducted and Other Group Premium Payment for Insurance Products
S1 / 5010_820_A1 Payroll Deducted and Other Group Premium Payment for Insurance Products
S5 / 5010_820X Health Insurance Exchange Related Payments
P7 / 5010_824 Application Reporting for Insurance
T0 / 5010_834 Benefit Enrollment and Maintenance
T1 / 5010_834_A1 Benefit Enrollment and Maintenance
U0 / 5010_835 Health Care Claim Payment/Advice
U1 / 5010_835_A1 Health Care Claim Payment/Advice
V0 / 5010_837D Health Care Claim: Dental
V1 / 5010_837D_A1 Health Care Claim: Dental
V2 / 5010_837D_A2 Health Care Claim: Dental
W0 / 5010_837I Health Care Claim: Institutional
W1 / 5010_837I_A1 Health Care Claim: Institutional
W2 / 5010_837I_A2 Health Care Claim: Institutional
X0 / 5010_837P Health Care Claim: Professional
X1 / 5010_837P_A1 Health Care Claim: Professional
O3 / 6020_275C Patient Information *

* Binary attachment transactions 275C/275R/6020 275C are supported only in SERENEDI 2024, and not in SERENEDI 2022 or SERENEDI for Snowflake.

4010 270 Health Care Eligibility Benefit Inquiry
4010 270 Health Care Eligibility Benefit Inquiry A1
4010 271 Health Care Eligibility Benefit Response
4010 271 Health Care Eligibility Benefit Response A1
4010 276 Health Care Claim Status Request
4010 276 Health Care Claim Status Request A1
4010 277 Health Care Claim Status Response
4010 277 Health Care Claim Status Response A1
4010 278 Health Care Services Review – Request
4010 278 Health Care Services Review – Request A1
4010 278 Health Care Services Review – Response
4010 278 Health Care Services Review – Response A1
4010 820 Payroll Deducted and Other Group Premium Payment for Insurance Products
4010 820 Payroll Deducted and Other Group Premium Payment for Insurance Products A1
4010 834 Benefit Enrollment and Maintenance
4010 834 Benefit Enrollment and Maintenance A1
4010 835 Health Care Claim Payment/Advice
4010 835 Health Care Claim Payment/Advice A1
4010 837 Health Care Claim: Dental
4010 837 Health Care Claim: Dental A1
4010 837 Health Care Claim: Institutional
4010 837 Health Care Claim: Institutional A1
4010 837 Health Care Claim: Professional
4010 837 Health Care Claim: Professional A1
5010 270 Health Care Eligibility Benefit Inquiry
5010 270 Health Care Eligibility Benefit Inquiry A1
5010 271 Health Care Eligibility Benefit Response
5010 271 Health Care Eligibility Benefit Response A1
5010 276 Health Care Claim Status Request
5010 277CA Health Care Claim Acknowledgment
5010 277 Health Care Claim Status Response
5010 278 Health Care Service Review – Request for Review
5010 278 Health Care Service Review – Response
5010 820 Payroll Deducted and Other Group Premium Payment for Insurance Products
5010 820 Payroll Deducted and Other Group Premium Payment for Insurance Products A1
5010 820X Health Insurance Exchange Related Payments
5010 824 Application Reporting for Insurance
5010 834 Benefit Enrollment and Maintenance
5010 834 Benefit Enrollment and Maintenance A1
5010 835 Health Care Claim Payment/Advice
5010 835 Health Care Claim Payment/Advice A1
5010 837 Health Care Claim: Dental
5010 837 Health Care Claim: Dental A1
5010 837 Health Care Claim: Dental A2
5010 837 Health Care Claim: Institutional
5010 837 Health Care Claim: Institutional A1
5010 837 Health Care Claim: Institutional A2
5010 837 Health Care Claim: Professional
5010 837 Health Care Claim: Professional A1
5010 999 Acknowledgment

Frequently Asked Questions

What are the major differences between SERENEDI for Snowflake and SERENEDI for Windows?

SERENEDI for Snowflake maintains the managed schema and pipelines of SERENEDI for Windows, but removes the SCORE scripting system entirely – the SERENEDI for Snowflake workflows have fixed functionality. It also lacks support for the binary attachment (275) specifications.

What is a general overview of Chiapas EDI?

Chiapas EDI is a development platform focused on enabling enterprises to work directly with managed care healthcare EDI files, such as eligibility, billing and remittances.  It is composed of a ‘Chiapas Studio’ oriented towards developing new transactions, as well as the a background automation system and job control system.  The distribution database contains sample data and workflows oriented toward common business scenarios.  Finally, all of the mappings present in all of the specifications is documented within pre-generated HTML files.

What distinguishes Chiapas EDI from other EDI platforms?

Probably the most single most significant thing is that this platform was developed by and for healthcare developers in order to reduce the complexity burden on the developers.  Even though the HIPAA Implementation Guides describe a highly complex set of data protocols, Chiapas EDI enables the encoding of any compliant EDI file with a single stored procedure call, and decoding EDI files can be done with no programming at all.  

The Chiapas EDI distribution fully describes every valid mapping, as well as provides a number of default workflows and sample files to get started.

What documentation comes with Chiapas EDI 2014?

The primary source of documentation is the included user manual located in C:\chiapas\docs\ChiapasUserManual.pdf.  The individual mappings for the specifications as well as Addenda changes to the base mappings are located in the C:\chiapas\docs\CGIF folder.

What specifications does Chiapas EDI 2014 support?

  • 270 – Health Care Eligibility Benefit Inquiry
  • 271 – Health Care Eligibility Benefit Inquiry Response
  • 276 – Health Care Claim Status Request
  • 277 – Health Care Claim Status Response
  • 277 CA – Health Care Claim Acknowledgment
  • 278 REQ – Health Care Services Review-Request for Review
  • 278 RESP – Health Care Services Review-Response
  • 820 – Payroll Deducted and Other Group Premium Payment for Insurance Products
  • 820X – Premium for Health Insurance Exchange
  • 824 – Application Reporting
  • 834 – Benefit Enrollment and Maintenance
  • 835 – Health Care Claim Payment/ Advice
  • 837 D – Health Care Claim: Dental
  • 837 I – Health Care Claim: Institutional
  • 837 P – Health Care Claim: Professional
  • 999 – Transaction Acknowledgment
  • TA1 Transaction Acknowledgment

Each transaction set is fully implemented in both 4010 and 5010 versions with all published Addenda. The HIPAA Implementation Guides are copyrighted and controlled materials available at the X12 website

Can the software be used for real-time transactions?  Does it have large file support?

Yes, and yes. Smaller transactions can generally be created or parsed in real-time. The software can handle multiple files simultaneously and fully utilize server resources. Large transactions can be handled if the server has the RAM available. The software is 64-bit and capable of handling large files. Note: Very large files may not be able to be displayed on the Chiapas Studio GUI display elements, but can still be processed through the system.

What is Chiapas EDI Version 1, and how is it related to Chiapas EDI 2014?

Chiapas EDI Version 1 was created in 2003 and licensed and used in several San Francisco Bay Area enterprises, including one HMO where it was used in production for a decade. It was released as open source in 2005, and has since been downloaded thousands of times, and there are companies that still use it today.

Chiapas EDI 2012 was a complete rewrite to evolve the technology to be a professional developed and supported EDI solution for corporations of all tiers. Chiapas EDI 2014 built upon 2012 and greatly extended the ‘out-of-the-box’ transformation functionality.

Whenever we decode a file, we see the identifiers appear but never see the qualifiers get mapped. Why is this?

Qualifiers represent metadata, in other words, information that provides context to other information. The design of Chiapas EDI 2014 is focused on minimizing the metadata an analyst needs to know about in order to get productive with EDI. For this reason, all identifier/qualifier pairs are represented within a single column mapping within Chiapas EDI. For this reason, many specific elements have many possible mappings because the preceding element contains a number of qualifiers. In this way, the mappings are more aligned with business information than they are with EDI formatting, and are therefore easier to work with.

Can the software test the integrity of HIPAA files?

Yes, the software package supports Level 1 and Level 2 SNIP integrity testing, as defined on pages 15 and 16 on the SNIP whitepaper.  Generally, this fully covers the basic syntax of the transaction.

When developing a new outbound claim file using a stored procedure, I am noticing the Claim loop repeat multiple times in the output file – why are these erroneous loops occuring?

One of the jobs of the Chiapas EDI encoding engine is to translate a ‘Flat’ data source like a stored procedure into an internal hierarchical format that mirrors an EDI file. In a Flat data source, much of the data is repeated across successive rows – in fact, the only data that should be different between different rows is when a new loop occurs.  The encoder engine looks for ‘deltas’ between successive rows to determine when to create a new iteration of an outer loop such as the 2300 Claim Header loop or a new transaction set.

Problems arise when data is provided to the encoding engine that cause unplanned ‘deltas’. This will cause unwanted loop iterations. For example, let’s say there is a problem in the mapping of the Claim ‘Place of Service’ field that causes it to have a different value for a certain procedure code:

L2300_S01_CLM01_PATNT_CONTRL_NRL2300_S01_CLM05_01_PLAC_SVC_CDL2400_S01_LX01_ASGND_NR
000010111
000011111
000011122
000011113

This will create four iterations of the CLM segment when the business intent would be to create just two. The first CLM will be associated with Patient Control Number 000010, which is correct. The second CLM will be triggered by the new Patient Control Number 000011. The erroneous third CLM segment will be triggered because the Place of Service code mapping is 12 instead of 11 as it was on the previous line. Finally, the fourth erroneous CLM segment will be generated because the Place of Service code changes back to 11.

To repair this issue, the developer needs to ensure that mappings associated to a particular iteration of a loop on the outbound EDI stay consistent with that iteration.  If a claim has three service lines, then only the data for those service line mappings should change for that claim – the claim mappings will be the same.

What is an example for developing a new outbound EDI process with Chiapas EDI 2014?

At a high level, to develop any outbound process you will need the companion guide for your trading partner (if available), the HIPAA Implementation Guide for the transaction you are submitting, and of course you will need the enterprise data that you intend to submit.

This answer will focus on the easiest critical path for development, which is via a stored procedure. Chiapas EDI comes with thirteen SQL Views as part of the distribution database that can create valid EDI files using the included mock healthcare data. These views represent established pipelines for creating EDI files, so they provide a foundation for creating new processes.  However, SQL Server does not guarantee specific ordering of rows via SQL Views, so therefore we will need a helper stored procedure to sort the output in a way the properly aggregates the EDI output.

First, launch Chiapas Studio and set up the Flat I/O Data Source window to connect to the chiapasData database (in most cases, the default connection string will be fine), and then ‘Table’ should be set to:

EXEC USP_ORDEREDI ‘vw_Export_834’

Then, press Execute, then select the HKey -> Flat to HKey pull down menu option, and press the Encode button. The EDI file will be displayed on the SegPool+Msgs pane. By pressing the Decode button, this same file will then be tested against HIPAA Level 1 and 2 SNIP integrity rules. In the first iteration, no error messages will be generated because the file will be a ‘clean’ EDI file from mock data.

Next, you will need to adjust the source code within the Stored Procedure to start projecting your business data instead of the included mock data and default values. Usually, this is best done just a few columns at a time before doing another cycle of testing within Chiapas Studio. You will have to select Help -> Reset All between test cycles to clear the internal Chiapas EDI registers.

It is very important to set at least one mapping for every header segment within every loop of your output. Furthermore, if you’d like suppress outputting certain loops in certain situations, every mapping associated with that loop must be set to NULL in order for the encoder engine to bypass that loop. Although the encoder can automatically populate HL and LX index values, the HL child code (HL04) must be supplied by the stored procedure.

When the resulting file successfully decodes without any errors and fulfills all of the business requirements, then the file can be said to be ‘ready’ for testing with the external trading partner.

How does Chiapas EDI 2014 enforce HIPAA compliant encryption?

No software can do this – a business must adopt HIPAA compliant communications policies and strictly enforce them. Primarily, this means that all Protected Healthcare Information must be protected with encryption and certain legal and binding agreements must be maintained between trading partners. Chiapas EDI natively supports encrypted SecureFTP communications using the integrated WinSCP client for communication with SecureFTP servers.

What automation capabilities are present within the software package?

Chiapas EDI 2014 comes with a rich set of Workflow Foundation 4 activities that allow users to create maintainable business processes with a graphical user interface. These processes can execute any function present within the Chiapas Studio interface, as well send EMails, put or get files on a Secure FTP server, interact with a database, and more. These activities are bundled into ‘Workflows’. Workflows can be triggered on a set schedule, the results of a SQL query, or new files placed in a directory or on a remote server.

Can I handle multiple files within a loop in the Workflow?

Chiapas EDI 2014 is not geared to handle multiple files within a single workflow instance. A single workflow should execute, at most, one encode and one decode operation. This means you will be able to decode a single file, store it to a table, execute some ETL, and then generate a 999 Acknowledgment file and save that to a different file.  If instead you enumerate files within a directory and try to decode them within a loop, this will have unpredictable results because the internal architecture of Chiapas EDI only fully ‘resets’ itself when the workflow first begins to execute.

This is an intentional part of the architecture of Chiapas EDI 2014: because numerous external factors within the .NET environment could be the source of a potential memory leak, the best way to process multiple files is to process them individually via the automation system, which will launch a new system process for every file being handled. As Worker processes only exist to handle a single workflow execution, they are constantly being respawned by the background Chiapas Service, and this in turn ensures a reliable and stable execution environment that can be stable for years at a time.

How scalable is Chiapas EDI 2014? What are some problems that hindered large scale file processing, and how were they resolved?

We’ve had a number of clients take advantage of the ‘core unlocked’ licensing tiers of the product and then use this product on some fairly beefy servers, processing literally tens of thousands of files at a time. Here are some insights:

Server Setup

To fully maximize server resources, you would need 3.5 worker processes and 3.5GB of free RAM for each physical core on the server. So, on a single CPU server with 8 cores, 24 worker processes and 24 GB free of RAM would allow that server to process 24 files simultaneously.

SQL Server Resource Contention

One significant obstacle encountered when trying to decode large-scale batches of files to a single database table is that SQL Server needs some special handling in order to work effectively. For example, when thirty Worker processes are all trying to insert data into the same database table simultaneously, resource locking and SQL timeouts become serious issues.

The latest release of Chiapas EDI 2014 has some logic for resolving these issues on two of the built-in database decode pipelines. First, all data is loaded into SQL Server to a uniquely named temp table. This eliminates the table locking issue, as each worker process is inserting into a dedicated table.

Then, a background automation process calls on a stored procedure which shuttles the data within these temp tables to their correct destination. Because this procedure works serially on one table at a time, it also avoids any possible table locking or timeouts.

Need Help?

All SERENEDI licensees receive unlimited next-business-day email support directly from our engineering team. Phone support with teleconferencing is included with every package.

Email: support@chiapas-edi.org   |   Phone: (530) 746-5102

Ready to Try SERENEDI?

Download the free 30-day evaluation and start exploring with the included sample data.